Cryptocurrency trading is a popular and lucrative investment option for many people around the world. Binance is a leading cryptocurrency exchange platform that allows traders to buy, sell, and trade various cryptocurrencies. Along with a popular cryptocurrency exchange platform for buying, selling, and trading various cryptocurrencies, Binance also offers a borderless, fast, and free payment transfer service. With Binance, you can send and receive payments in seconds from anywhere in the world without worrying about high transaction fees or currency exchange rates. In this article, we will guide you through the process of registering on Binance in a simple and straightforward manner. After the registration process, we will also explore how Binance enables fast, secure, and cost-effective cross-border payments.
Registration process on Binance
Step 1: Visit the Binance Website
The first step to registering on Binance is to visit the Binance App or official website at 👇
Binance official website
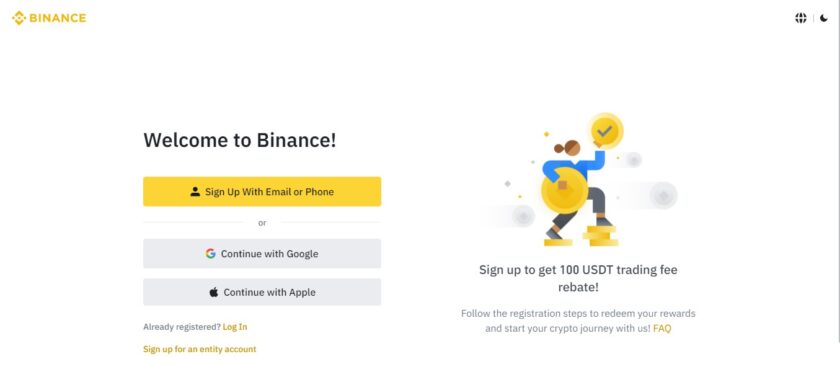
Step 2: Signup with an email or Phone number
Once you are on the Binance website, you will see the following interface of the website. Click on the “Signup” button located in the top right-hand corner of the screen. OR you can continue with Google or Apple ID.
Step 3: Enter Your Email Address and Create a Password
Next, you will be asked to enter your email address, name, and create a password for your account (if you’re choosing signup option). Make sure you choose a strong password that is difficult to guess and contains a mix of letters, numbers, and special characters.
Step 4: Verify Your Email Address
After you have entered your email and password, Binance will send you an email with a verification link. Click on the link to verify your email address and activate your account.
Step 5: Complete the Security Verification Process
To ensure the security of your account, Binance requires you to complete a verification process. This process involves providing personal information such as your name, date of birth, and address. You will also need to provide a government-issued ID, such as a passport or driver’s license, for identity verification purposes. This is known “KYC” (Know Your Customer). KYC is important as this will help Binance secure your account from any potential hacker tricks and losing your funds.
Step 6: Enable Two-Factor Authentication
Enabling Two-factor is a volunteer action, But I would personally recommend to please enable it and you can use Google Authenticator App that can be downloaded from Play store or App store for free. This adds an extra layer of security to your account and helps protect it from unauthorized access.
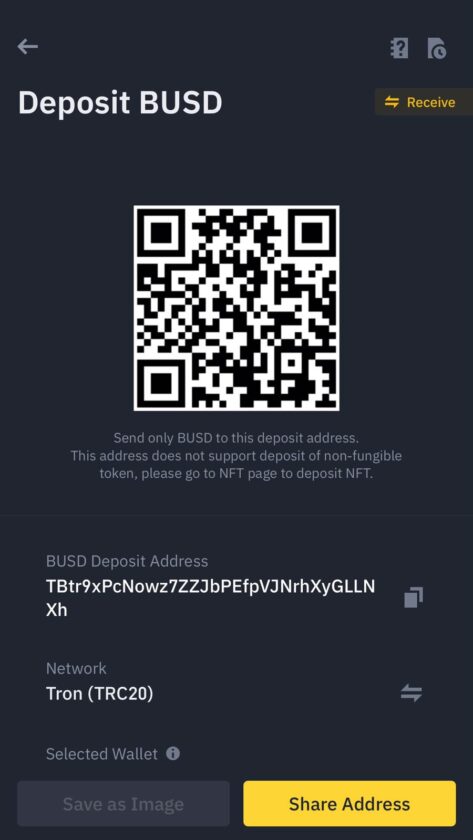
Step 7: Fund Your Account
Once your account is set up and verified, you can fund your account by depositing cryptocurrency, stable, or fiat currency. Binance supports a wide range of cryptocurrencies and fiat currencies, so you should have no problem finding a suitable payment method. I would recommend personally to chose BUSD. This is a stablecoin owned by Binance and has a worth equal to USD. This can be used to transfer cross-border payments and purchase any other cryptocurrency, or fiat currency including GBP or USD.